Your First Network
This guide helps you create your first drasyl network. Before starting, make sure you have drasyl installed on at least two devices.
In this example, we assume you have installed drasyl on the following devices:
- Device A (john-desktop):
689a1b9f5efcb861ac67ce185ddb2396444326e12fe1df353731416f5a3a2706 - Device B (john-notebook):
43c4fda1ed1e810a30b141ae2c644465a8e06d15a2a7259e91aaa2112e1d58c7
You can copy your public key by clicking on it in the drasyl UI.
Alternatively, run drasyl status in your terminal to display it.
Step 1: Create a Network Configuration
drasyl networks are defined via configuration files. Use our web-based editor to create one: https://editor.drasyl.org
Network Basics
- Give your network a name (e.g.,
My first network). - Choose a private IP range (e.g.,
10.96.41.0/24). The editor suggests compliant ranges.
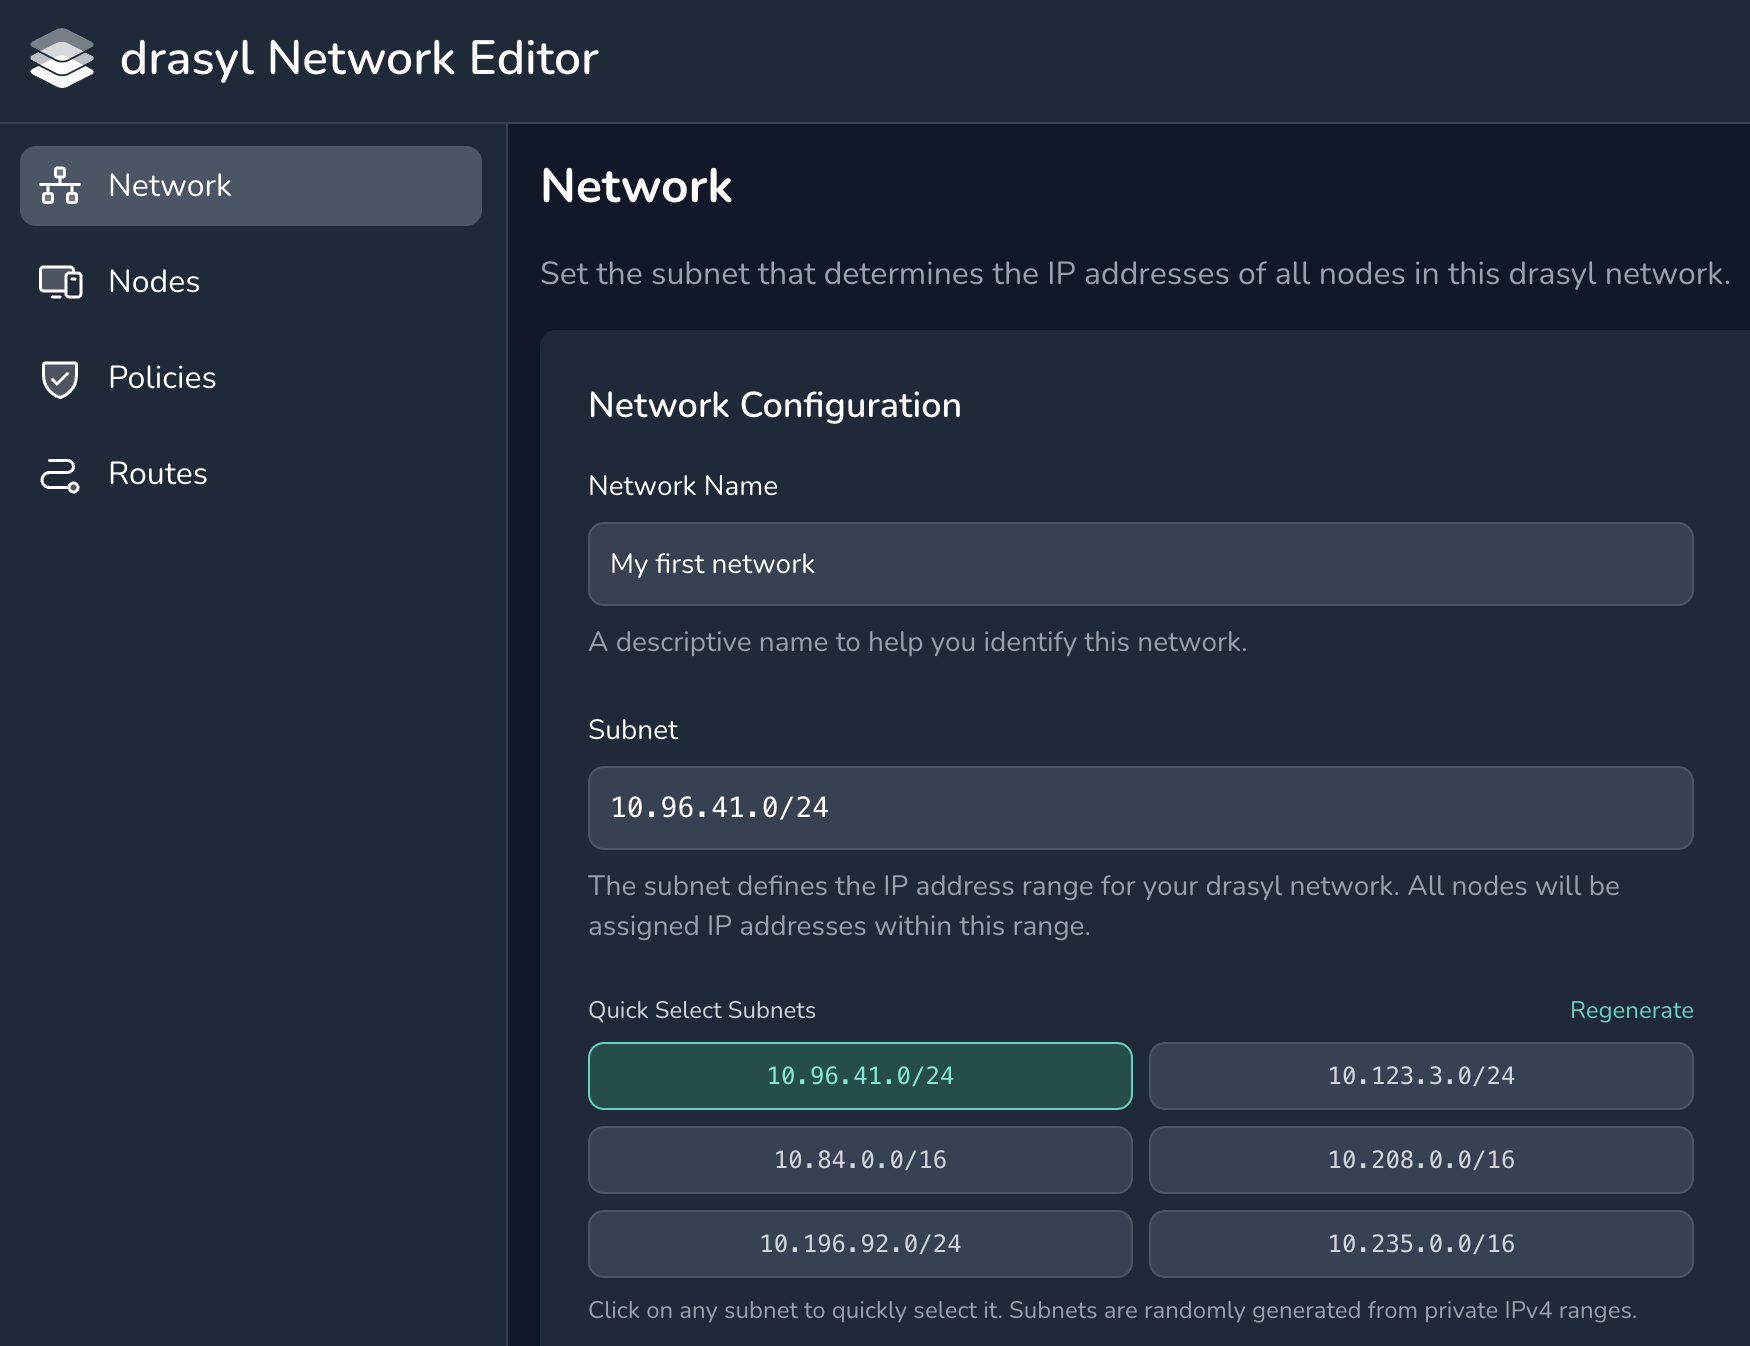
Figure 1: Network settings page with basic configuration options
Step 2: Add Devices by defining Nodes
Add each device’s public key, assign a hostname, and specify an IP address within the network range. The editor will automatically suggest an available IP address.
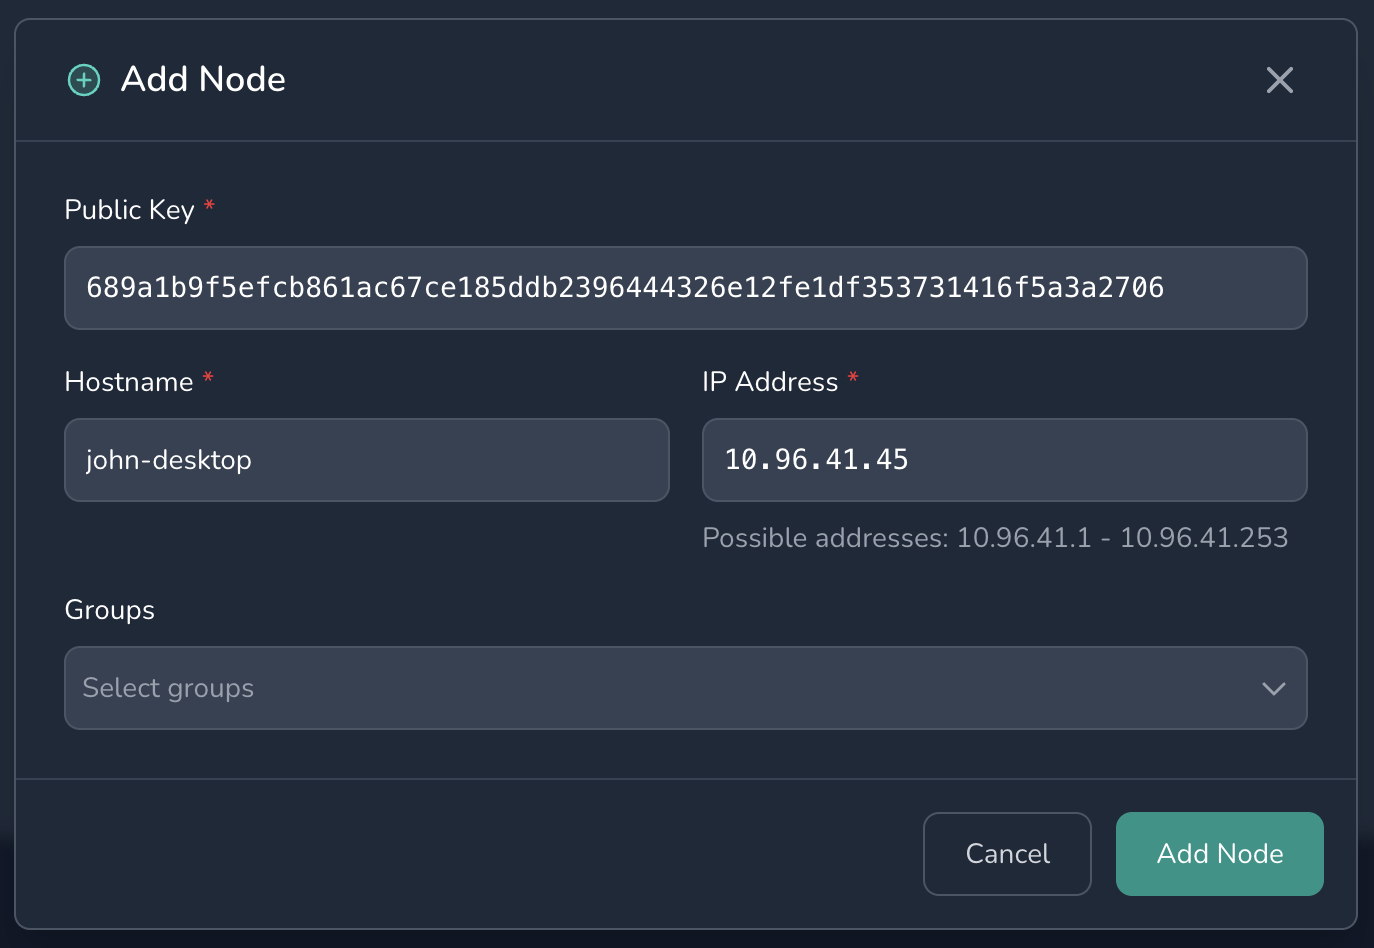
Figure 2: Dialog for adding a node to the network
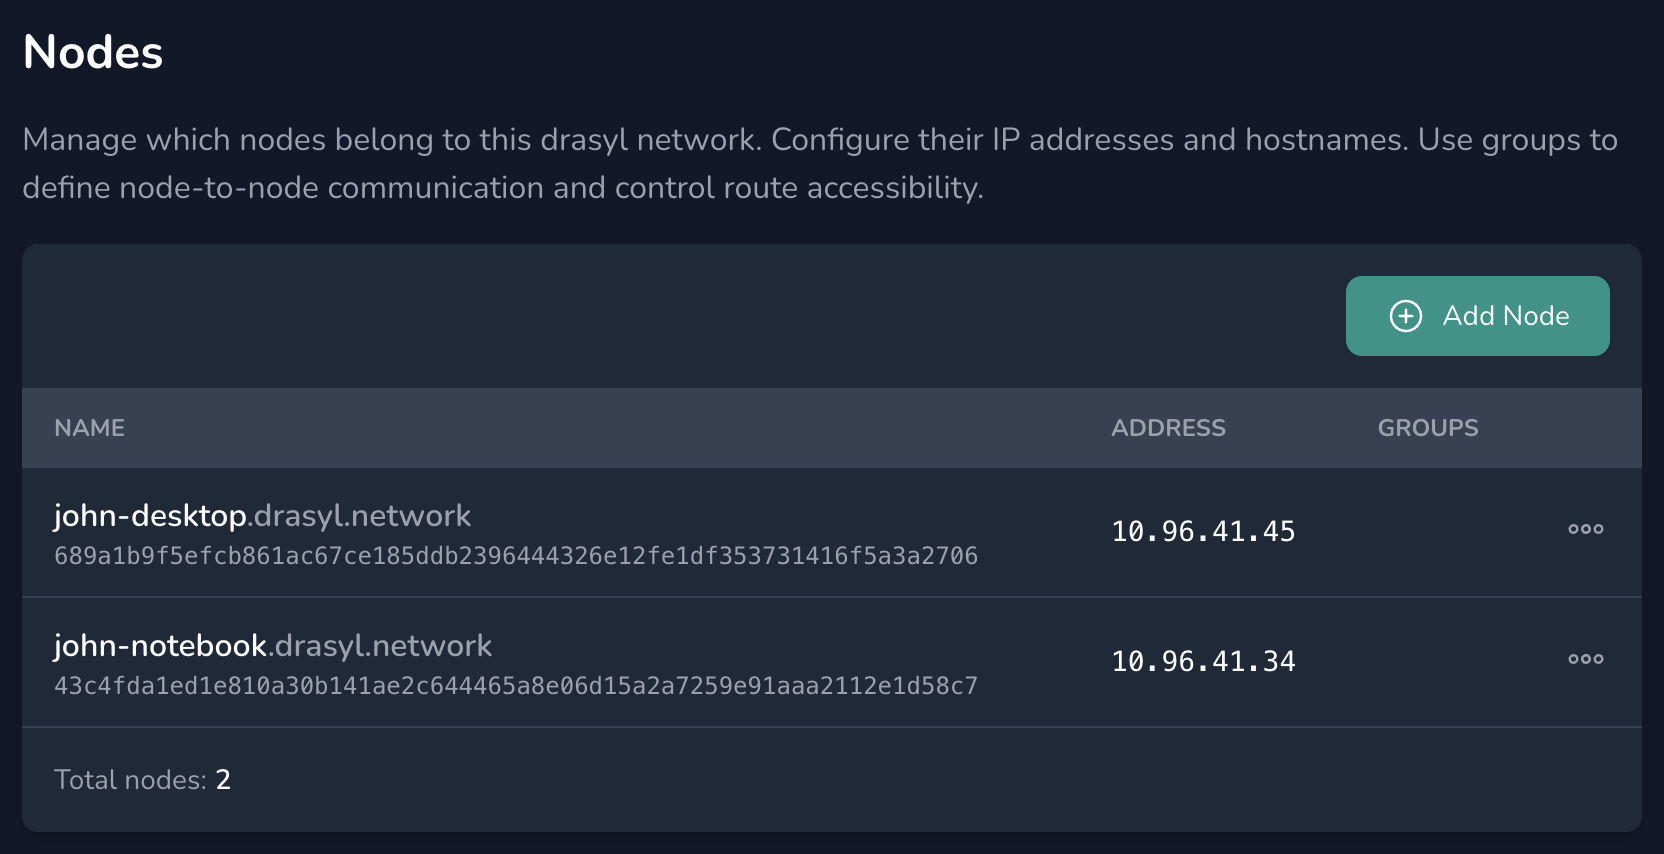
Figure 3: List of all devices added to the network as nodes
Step 3: Add a Communication Policy
Define a policy that allows your nodes to communicate:
- Allow all nodes in group
ALLto communicate with each other.
Every node is implicitly part of the ALL group.
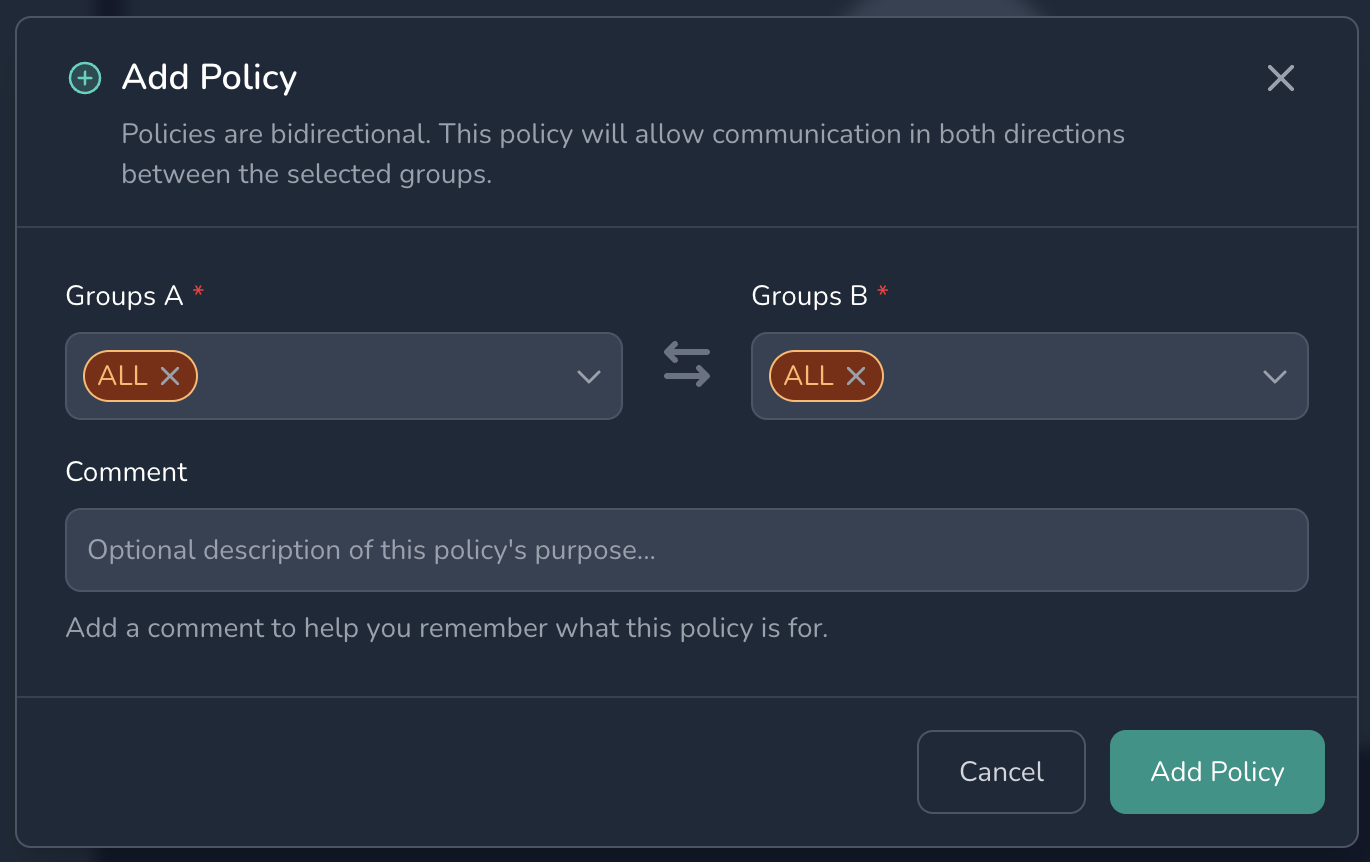
Figure 4: Dialog for creating a policy
Step 4: Download the Configuration
Click "Get Config" in the editor to download your network configuration file.
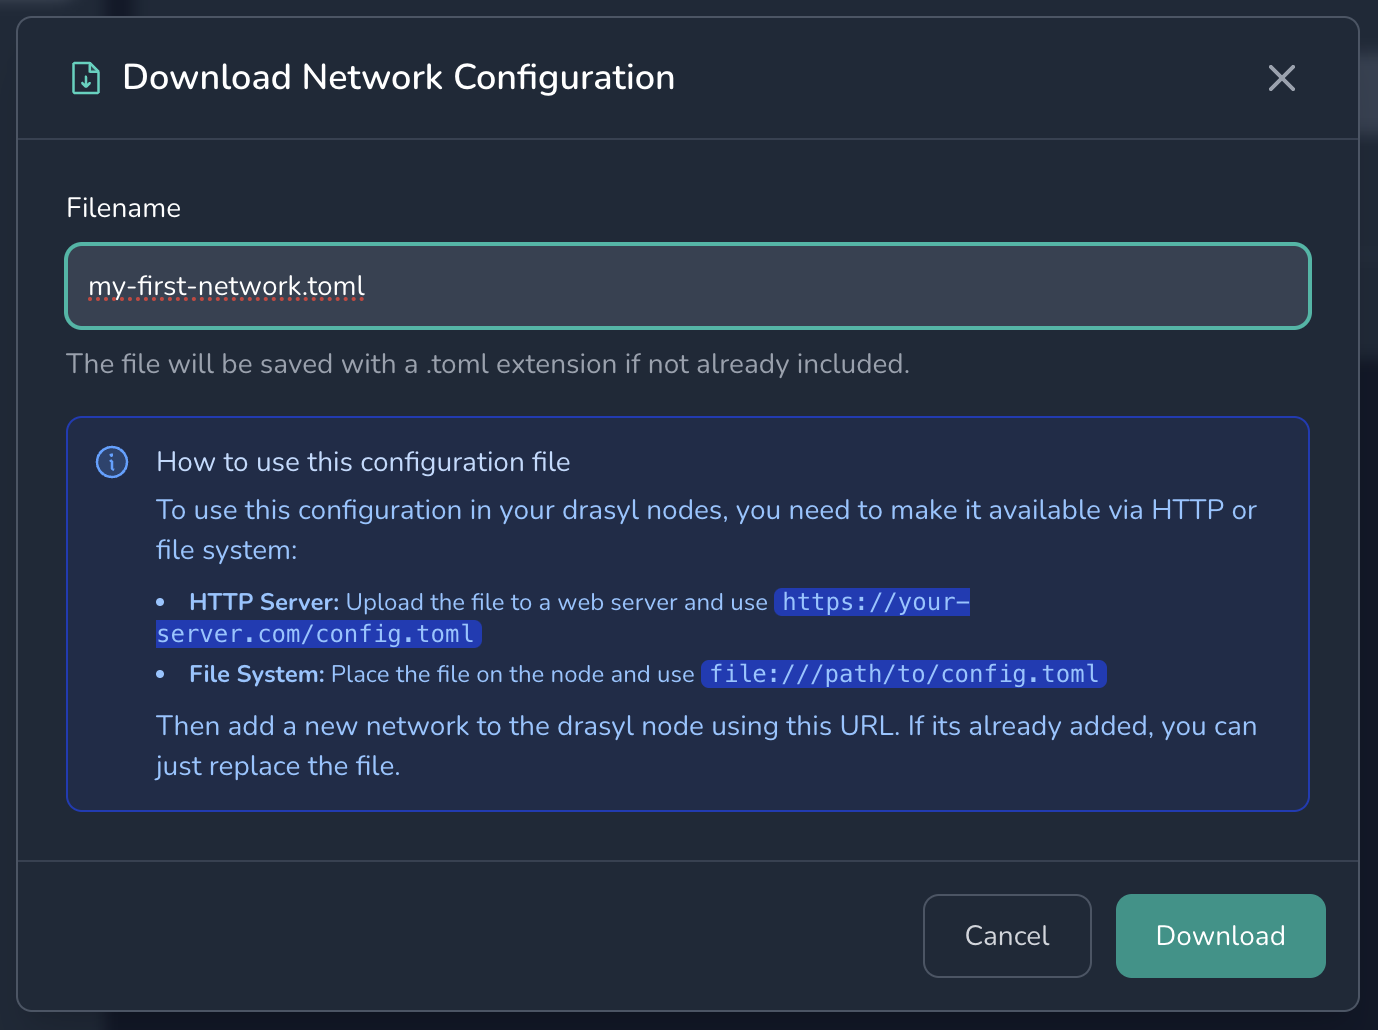
Figure 5: Download dialog for configuration file
Step 5: Add the Configuration on Each Device
-
You now need to add the configuration on each device. The simplest method is to store it locally.
-
Save the configuration file as
my-first-network.tomlin your home directory on each device.
Example file URL:
- Windows
- macOS
- Linux
file:///C:/Users/JohnDoe/my-first-network.toml
file:///Users/johndoe/my-first-network.toml
file:///home/johndoe/my-first-network.toml
Open the drasyl UI and click "Add Network…". Paste the file URL and confirm.

Figure 6: Menu showing "Add Network..." option
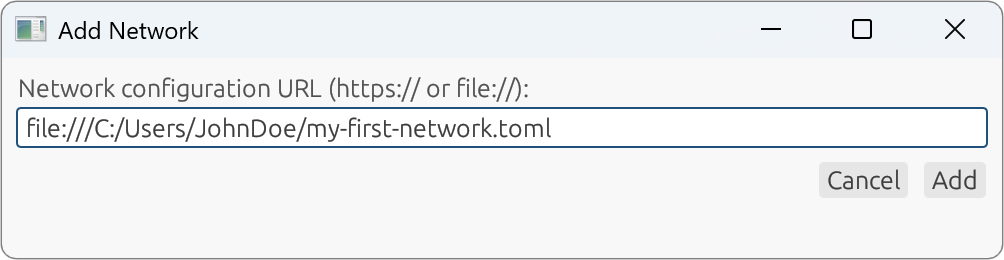
Figure 7: Modal for adding a network
Step 6: Verify Network Join
After a short time, your network should be listed in the UI on both devices. Click on the network entry.
You should see:
- The network interface device name.
- Assigned IP address.
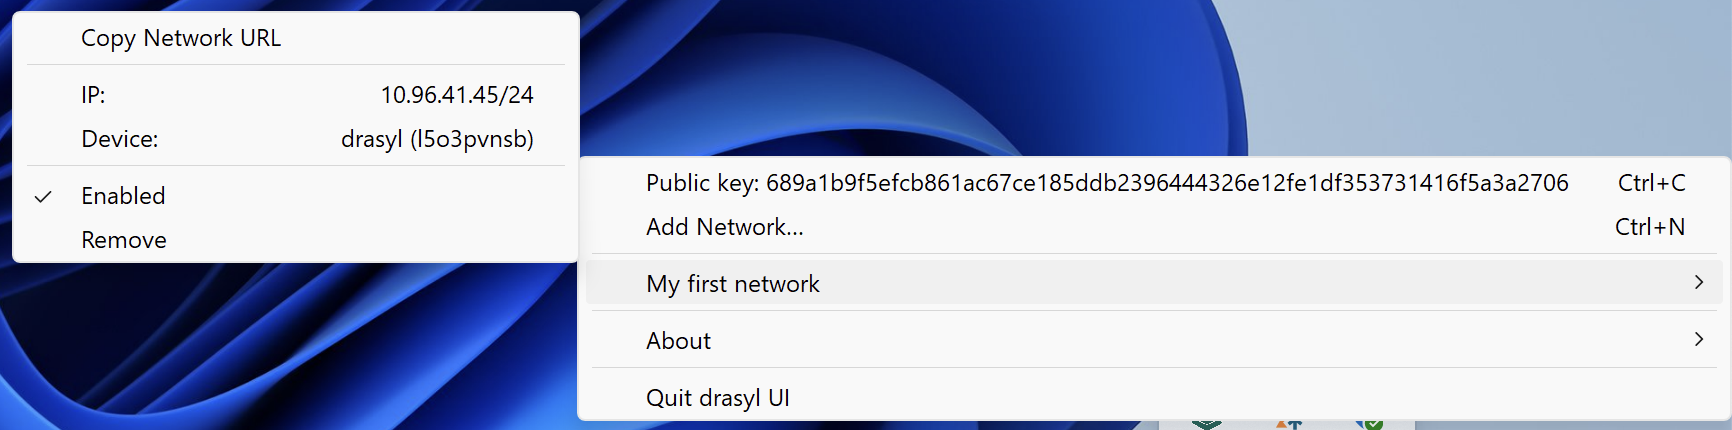
Figure 8: Node successfully joined the network - network device created and IP address assigned
Repeat this process on all participating devices.
Step 7: Test Connectivity
Try pinging one device from another:
john-notebook:~$ ping 10.96.41.45
PING 10.96.41.45 (10.96.41.45): 56 data bytes
64 bytes from 10.96.41.45: icmp_seq=0 ttl=64 time=1.2 ms
64 bytes from 10.96.41.45: icmp_seq=1 ttl=64 time=1.1 ms
64 bytes from 10.96.41.45: icmp_seq=2 ttl=64 time=1.3 ms
64 bytes from 10.96.41.45: icmp_seq=3 ttl=64 time=1.1 ms
^C
--- 10.96.41.45 ping statistics ---
4 packets transmitted, 4 packets received, 0.0% packet loss
round-trip min/avg/max/stddev = 1.1/1.2/1.3/0.1 ms
- ✅ Congratulations! Your first drasyl network is up and running.
- 👉 Continue with the Concepts section to explore more features.